products

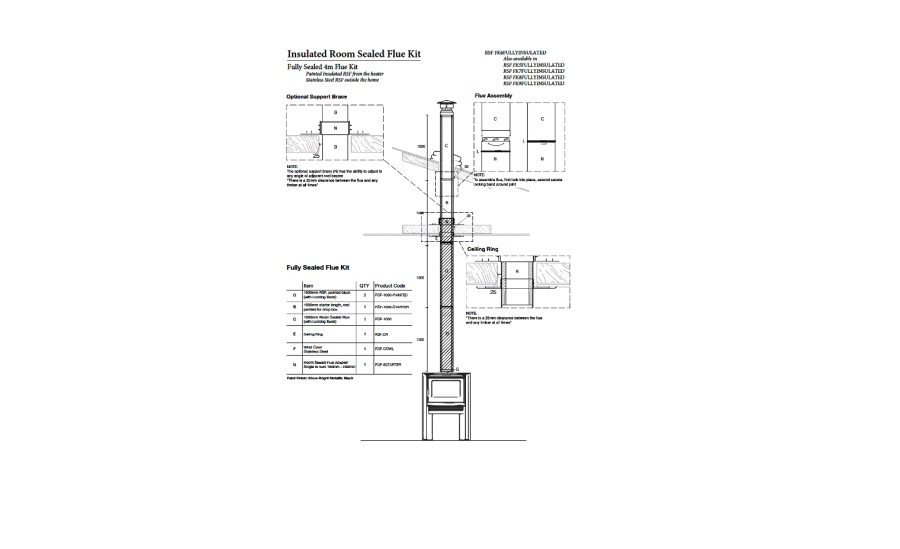
How to install a Room Sealed Flue Kit

These videos will run you through how to install a Room Sealed Flue Kit for your wood heater.

Step by Step videos.

Check with your local authority before you install your wood heater. Different states have different laws regarding installing wood heaters.

We advise you to follow your local regulations.

These videos will run you through how to install a Room Sealed Flue Kit for your wood heater.

Step by Step videos.

How to install RSF full manual

To download the RSF HOW TO INSTALL Manual - CLICK HERE

Safety First

Before installing any wood heater, you want to make sure you do it safely.

Tools you will need

Here is a quick list of the tools you need to install Pivot's Room Sealed Flue Kit.

Full Video on installing with a Metal roof

This is a full video for installing Pivot's ROOM SEALED FLUE KIT (RSF) on a METAL ROOF

Full Video on installing with a tile roof

This is a full video for installing Pivot's ROOM SEALED FLUE KIT (RSF) on a TILE ROOF

How to join the Room Sealed Flue

Pivot's Room Sealed Flue is so easy to join
Our unique twist-lock system locks the flue together.

Step 1: RSF Starter

STEP 1

Every wood heater has a slightly different size flue connector (flue spigot).
This is what you need to do to ensure your RSF fits your wood heater.

Step 2: Your wood heater clearances

STEP 2

Every wood heater has different clearances from your walls
Checking your clearances is critical before installation.

Step 3: Lining up your flue

STEP 3

This shows you how to plum-bob your flue position.

Step 4: Cutting your ceiling

STEP 4

This shows you how to cut your plaster ceiling to the correct size.

Step 5: FOR METAL ROOF

STEP 5: METAL ROOF

This shows you how to position the flue through your metal roof.

Step 5: FOR TILE ROOF

STEP 5: TILE ROOF

This shows you how to position the flue through your tile roof.

Step 6: Installing your ceiling ring

STEP 6

This shows you how to install your ceiling ring.

Correct way to install your RSF ceiling ring

This additional video will show you the correct way to install your RSF ceiling ring to ensure a complete room seal.

Step 7: Installing your flue

STEP 7

This shows you how to install the first lengths of flue onto your heater.

Step 8: Bracing your flue

STEP 8

This shows you how to install the optional bracing for your flue.

Step 9: Flashing for Metal Roof

STEP 9: METAL ROOF

This shows you how to install the flashing on a metal roof.

Step 9: Flashing for Tile Roof

STEP 9: TILE ROOF

This shows you how to install the flashing on a tile roof.

Step 10: Installing your cowl

STEP 10

This shows you how to install your cowl.

Final Checks

FINAL CHECKS

This shows you important checks to make to ensure your flue is installed correctly.

Room Sealed Flue bracket options

If you need additional supports for your RSF flue, this video will show you the flue bracing options.

Conclusion

CONCLUSION


Pricing


Total Price $0.00 (inc GST)
Please note that this pricing is indicative only and does not represent a quotation, nor does it include installation or delivery unless explicitly specified.

Specification

dimensions
height mm
width mm
depth mm
Clearances
Rear clearance to combustible mm
Side clearance to combustible mm
Corner clearance to combustible mm
Rear clearance to non combustible mm
Side clearance to non combustible mm
Corner clearance to non combustible mm
Info
flue size mm
min flue height mtrs
hot water No
heating capacity m2
efficiency %
Emissions grms
wood length mm
stove weight kg